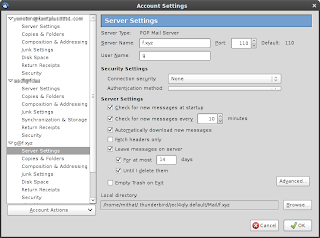
Thunderbird versions 3.0 and 3.1 have a feature that's meant to make configuring new accounts easier but in fact may just make life more complicated for some users. When you set up a new account, the new Tbird account wizard asks you for your name, email address, and password. It then automatically tries to configure the account for you by probing various "best options" using common conventions for port numbers, server names, etc. ... then Voila! you have a fully functioning account configured with SSL and the like if it's available, all without the hassle of dealing with entering server name and port numbers and "Use TLS/Use SSL" options.
The problem is that there's no way to override this. The new account wizard doesn't ask if you want to try an autoconfig or do a manual config--it just starts the autoconfig automatically. There is a "Manual Setup" button on the autoconfig dialog, but there's no way to press it before the autoconfig starts.
"No big deal," you say. "Just wait for the autoconfig to run its course and then go back and manually set the parameters you don't like." Well, that only works for some options. In particular, the "Account Settings" dialog doesn't let you change from IMAP to POP--so if the autoconfig decided that IMAP was your "best option", then that's what you're stuck with. And I've found no way to hit the "Manual Setup" button on the autoconfig dialog before the IMAP/POP selection has been made.
The problem has been reported in bug reports, and the developers' response seems to be, "We will address this in a future release."
"Ah," you say. "It's best to stick with Thunderbird 2 then." However, that's not such an attractive option. Quoting from the Mozilla website: "Please note that Thunderbird 2.0.0.24 is the last planned security and stability release of Thunderbird 2.0. We encourage you to update to Thunderbird 3.1."
So here's a workaround for dealing with v3's new account issues.
In the new account wizard dialog, enter a short bogus email address:
Then click "Continue".
The wizard will vainly try to find the bogus address and eventually give up.
Now is the time to select whether you want POP or IMAP. You will not get a second chance to do this. After you have made the appropriate selection, click "Manual Setup..." and then enter the real account details.
It may not be a pretty, but it seems to work.


No comments:
Post a Comment